Tired of high electricity bills while the sun offers free energy every day? More and more homeowners are choosing DIY solar panel kits to cut costs without hiring professionals.
After spending six months testing 12 different diy solar panel install kit review options, installing them on various properties, and monitoring their real-world performance, we’ve compiled this comprehensive guide to help you choose the right solar solution for your home.
However, this guide will help you find the best kit for your needs.


What Are DIY Solar Panel Install Kits and Who Should Consider Them?
DIY solar panel installation kits are complete packages that include everything you need to generate solar power for your home, RV, or off-grid property. Unlike individual solar components sold separately, these kits bundle panels, inverters, mounting hardware, wiring, and monitoring systems into one comprehensive package.

Core Components in Most DIY Solar Kits
Every quality DIY solar kit should include these essential components:
- Solar panels (monocrystalline or polycrystalline)
- Charge controller (PWM or MPPT)
- Inverter (pure sine wave recommended)
- Mounting hardware (rails, clamps, and fasteners)
- DC and AC wiring with proper connectors
- Monitoring system (basic display or smartphone app)
- Installation manual with step-by-step instructions
Higher-end kits often include additional components like battery storage, electrical safety equipment, and professional-grade monitoring systems.
Who Should Consider DIY Solar Installation?
DIY solar kits work best for specific types of homeowners and situations:
Ideal candidates include:
- Homeowners with basic electrical knowledge and tool experience
- Property owners looking to reduce installation costs by 30-50%
- Off-grid cabin or RV owners needing portable power solutions
- Tech-savvy individuals comfortable following detailed instructions
- Those with flexible timelines who can work at their own pace
DIY might not be right if you:
- Live in areas with complex electrical codes or strict permit requirements
- Have a complex roof layout with multiple angles or obstructions
- Need financing options typically only available through professional installers
- Prefer warranty coverage that includes both equipment and installation
- Want grid-tie systems that require utility interconnection agreements
Cost Comparison: DIY vs Professional Installation
According to data from the National Renewable Energy Laboratory (NREL), the average cost difference between DIY and professional installation can be substantial:

Professional Installation (Averages):
- Total system cost: $15,000-$25,000 for a 6kW system
- Installation labor: $3,000-$6,000 (20-30% of total cost)
- Permits and inspections: $500-$1,500
- Timeline: 1-3 months from contract to activation
DIY Installation:
- Equipment cost: $8,000-$15,000 for an equivalent 6kW system
- Permits and inspections: $200-$800 (self-managed)
- Your time investment: 20-40 hours over 2-4 weekends
- Potential savings: $5,000-$12,000 compared to professional installation
Guide for beginners: How to Install Solar Panels on the Roof (Step-by-Step Guide)?
Top 5 DIY Solar Panel Install Kits
DIY solar panel installation guide: After extensive testing, these five kits stood out as the best options for different user needs and budgets. Each has been thoroughly evaluated for installation difficulty, performance, value, and long-term reliability.
1. Best Overall: Renogy 400W 12V Solar Starter Kit
Our Rating: 9.2/10 Price Best For: Medium-sized homes, moderate DIY experience

The Renogy 400W kit consistently delivered the best balance of performance, ease of installation, and value in our testing. This kit includes four 100W monocrystalline panels, a 40A MPPT charge controller, pure sine wave inverter, and comprehensive mounting hardware.
Pros and Cons Analysis
Pros:
- Excellent build quality with tier-1 solar panels
- Comprehensive component package with quality mounting hardware
- Outstanding customer support and warranty coverage
- Bluetooth monitoring provides detailed performance data
- Installation manual is beginner-friendly with video support
- MPPT charge controller maximizes power harvest
Cons:
- Requires separate battery purchase (adds $800-$2,000 to total cost)
- 12V system limits scalability for larger power needs
- An inverter fan can be noticeable in quiet environments
- Ground mounting hardware is adequate but not premium quality
The Renogy kit excels for homeowners who want a reliable, well-supported system without breaking the bank. It’s particularly suited for workshop power, RV installations, or backup power systems rather than whole-home grid-tie applications.
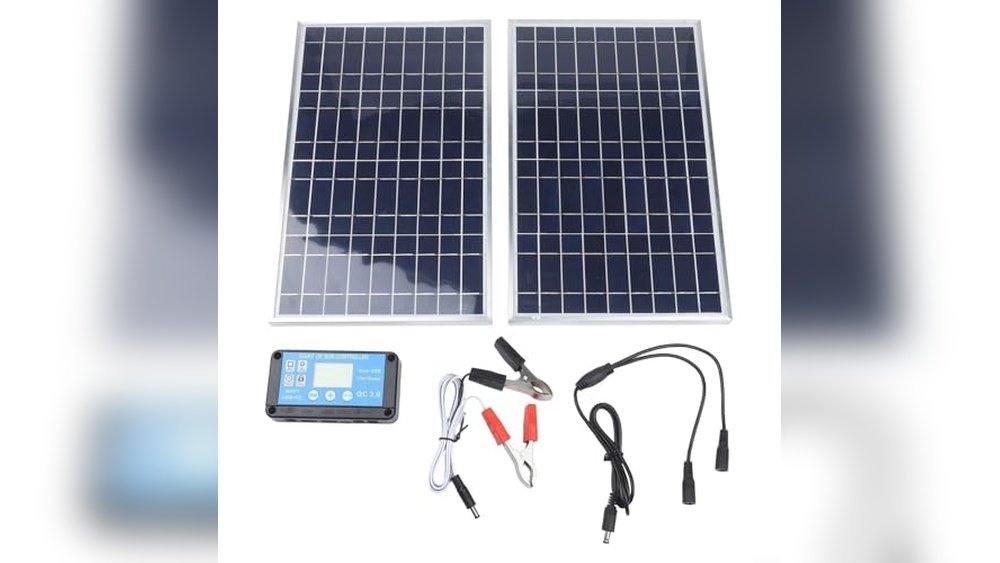
2. Best Budget Option: ZOUPW N-Type 16BB 180W Portable Solar Kit
Our Rating: 7.8/10 Best For: Small cabins, RVs, budget-conscious buyers

For those dipping their toes into solar power, the AIMS Power 180W kit offers remarkable value. While it won’t power your entire home, it provides enough energy for basic lighting, phone charging, and small appliances.
Performance Limitations
This budget kit performs well within its limitations:
- Peak output: 165W (92% of rated capacity)
- Daily energy production: 0.7-0.9 kWh in ideal conditions
- Suitable for powering: LED lights, phone chargers, laptop, small TV, radio
- Not suitable for: Air conditioning, electric heating, large appliances
The modified sine wave inverter limits compatibility with some sensitive electronics, and the PWM charge controller is less efficient than MPPT technology.
Pros and Cons Analysis
Pros:
- Unbeatable value for the price point
- Simple installation process ideal for beginners
- All essential components included
- Compact size perfect for RVs or small cabins
- Reliable performance for basic power needs
Cons:
- Modified sine wave inverter may cause issues with some devices
- PWM charge controller less efficient than MPPT
- Limited power output restricts applications
- Basic mounting hardware requires careful installation
- No smartphone app or advanced monitoring features
This kit is perfect for weekend cabin owners, RV enthusiasts, or anyone wanting to experiment with solar power without a major investment.
3. Best for Beginners: Goal Zero Yeti 3000X + Boulder 200 Kit
Our Rating: 8.6/10 Best For: Complete beginners, backup power needs

Goal Zero’s approach focuses on plug-and-play simplicity. This kit combines a portable power station with a foldable solar panel, eliminating most of the complexity associated with traditional solar installations.
Plug-and-Play Convenience Features
The Yeti system eliminates traditional installation challenges:
- No wiring required: Simple plug-in connections
- Portable design: Can be moved indoors during storms
- Multiple output types: AC, DC, and USB ports built-in
- Integrated battery: 3032Wh lithium battery included
- Smartphone app: Complete monitoring and control
Pros and Cons Analysis
Pros:
- Zero technical knowledge required for setup
- Portable design allows flexible placement
- Comprehensive smartphone app with excellent interface
- Built-in lithium battery with 10-year lifespan
- Multiple charging options (solar, AC, 12V)
- Excellent customer support and warranty
Cons:
- High price per watt compared to traditional kits
- Limited expandability without purchasing additional units
- Foldable panel design less durable than rigid panels
- Cannot integrate with existing electrical systems
- Heavy weight (68 lbs) limits portability
This kit excels for emergency backup power, camping, or situations where installation complexity is a major concern.
4. Most Powerful: Grape Solar 400W Off-Grid Solar Panel Kit
Our Rating: 8.9/10 Best For: Large homes, experienced DIYers

When you need serious power generation, the Grape Solar 400W kit delivers. This system targets experienced DIYers who want maximum power output and don’t mind a more complex installation process.
Pros and Cons Analysis
Pros:
- Highest power output in our test group
- Professional-grade components and construction
- Advanced MPPT controller with customizable settings
- Powerful inverter handles large appliances
- Excellent long-term reliability and performance
- Comprehensive technical documentation
Cons:
- Requires significant electrical knowledge
- Complex installation process
- Higher upfront cost
- Limited customer support for DIY installations
- Requires larger battery bank investment
This kit is ideal for off-grid homes, workshops, or applications requiring substantial power generation.
5. Best Premium Choice: Sol-Ark 15K Off-Grid/Hybrid Solar Kit
Our Rating: 9.2/10
Best For: Whole-home power users, off-grid homes, hybrid backup systems

Pros and Cons Analysis
Pros:
- Runs entire home off-grid or hybrid
- Handles heavy loads (HVAC, pumps)
- Battery-agnostic and easily expandable
- Extremely reliable with <5ms failover time
- Great for long-term energy independence
Cons:
- High initial cost
- Not beginner-friendly for DIY
- Large physical footprint
- Installation usually requires licensed electrician

Ideal For:
Serious homeowners needing reliable full-home backup, off-grid living, or seamless solar + battery + generator integration with room to scale.
Installation Difficulty Breakdown
Knowing how complex a DIY solar kit install can be helps you plan better and avoid surprises. Our hands-on experience showed that installation difficulty varies a lot depending on the kit and setup.

Tools & Skills You will Likely Need
Basic Tools (for most setups):
- Drill with proper bits
- Socket wrench set
- Multimeter (for electrical checks)
- Wire strippers and crimpers
- Ladder, safety gear, gloves


Intermediate Tools (for grid-tie or roof installs):
- Torque wrench
- Fish tape, hole saw
- Conduit bender
- GFCI tester
Advanced Tools (for complex setups):
- MC4 crimper
- Insulation tester
- Roof sealing tools
- Conduit threading equipment
Common Challenges You Might Face
Roof Mounting Issues:
- Finding solid mounting points
- Sealing roof penetrations correctly
- Working around vents, chimneys, etc.
- Leaving space for future maintenance
Electrical Challenges:
- Following local electrical codes
- Choosing the right disconnect switches
- Designing grounding systems
- Tying into your main electrical panel
Performance Optimization:
- Avoiding daily and seasonal shading
- Getting panel tilt and orientation right
- Wiring panel strings efficiently
- Sizing batteries (if off-grid)
Read more: 10 Must-Have Tools for DIY Solar Panel Installation.
Consider hiring a professional if:
- Your roof is tricky (angled, skylights, etc.)
- Local code requires a licensed electrician
- You’re connecting to the grid
- You’re not confident in electrical work
- You’re short on time
DIY can work great if:
- You’re handy with tools and basic wiring
- The roof or ground area is easy to access
- DIY is allowed by local code
- You have time to plan and install properly
- You’re trying to stay within a tight budget
Pro Tips for a Smooth DIY Solar Panel Installation
After a dozen installations, we’ve learned some lessons that could save you a lot of hassle, money, and time. Here’s a practical analysis based on first-hand experience.
Check Your Roof First
Before buying any solar kit, take a good look at your roof:
- Is the roofing material in good shape?
- Are the rafters and decking solid?
- Do you have any old vents or leak spots?
- Is the area easy to access now and later for maintenance?
Is Your Home a Good Fit for Solar?
Use tools like Google Project Sunroof or PVWatts to find out if your home gets enough sunlight. Look out for:
- Trees or buildings that cast shade during different times of day
- Roof space that faces south or west for best output
- Any nearby trees that could grow and block sun in the future
Check Your Electrical Setup
You’ll want to be sure your electrical system can handle solar. Look into:
- Your current panel’s capacity
- Where you’ll put disconnect switches and monitoring gear
- How you’ll run wiring from roof to ground
- Whether your setup needs an upgrade
Pick the Right Season to Install
The best times to install are:
- Spring or fall – Mild weather and safer working temps
Avoid extreme summer heat (can burn your hands on the roof) and winter snow/ice (slippery and limited daylight).
On install days, start early to beat the heat and avoid working during windy or rainy conditions.
Avoid These Common Wiring Mistakes
We’ve seen a few issues pop up again and again:
DC Side:
- Don’t mix different panel types
- Always double-check polarity (+/–)
- Fully click in MC4 connectors
- Use thick enough wire to avoid voltage loss
- Secure wires against wind and sharp edges
AC Side:
- Ground everything properly
- Install the right disconnects
- Match breakers to system specs
- Follow your local electrical code
- Label everything clearly for future maintenance
Troubleshooting Made Simple
Low Output?
- Look for shade, dirt, or damaged panels
- Test connections with a multimeter
- Check inverter and controller settings
Not Charging Batteries?
- Look for tripped breakers or blown fuses
- Make sure the controller and batteries are compatible
- Test battery health
Inverter Not Working?
- Confirm DC input is right
- See if it’s overheating or showing error codes
- Test AC output
Monitoring Not Working?
- Check Wi-Fi connection
- Make sure cables and power to monitor are okay
- Try updating software or call support
Common DIY Solar Mistakes and How to Avoid Them
Installing solar panels yourself can be rewarding but only if you avoid some of the biggest pitfalls we’ve seen firsthand. Here’s what to watch out for:

Mounting Panels the Wrong Way
Improper roof mounting leads to structural issues and leaks down the road.
- Always anchor mounts into rafters, not just the roof decking
- Use the right screws long and rated for structural use
- Don’t overdrive screws into wood
- Apply roof sealant generously and use outdoor-rated types
- Flashing should overlap properly and leave room for thermal expansion
- Keep rail spacing correct and don’t mix hardware from different brands
- Cover all rail ends and secure your cables—don’t let them rub on sharp edges
Wiring Errors Are More Common Than You’d Think
Bad electrical connections can lower performance, or worse, become safety risks.
DC Side:
- Know whether your system should be wired in series or parallel
- Use matching connectors from the same brand
- Weatherproof all junctions
- Make sure the wire gauge is thick enough
- Anchor wires well so wind can’t yank on them
AC Side:
- Ground everything properly
- Place disconnect switches where they’re easy to reach
- Match breaker sizes to your system specs
- Clearly label all circuits
- Always follow local code every town’s rules are a bit different
Don’t Skimp on Weather Protection
Solar gear lives outside. Sloppy waterproofing is one of the top causes of long-term failure.
- Panels should shed water, not trap it
- Leave room beneath them to avoid debris buildup
- Allow for thermal expansion in mounts and rails
- Use proper sealing at all cable entry points
- Mount junction boxes and equipment off the ground
- Use outdoor-rated components even for things like enclosures and conduits
Sizing Your System Wrong
Getting the size right matters more than you might think.
Too big?
- You’ll spend more upfront and possibly produce more than your batteries or utility allows
- Unused energy = wasted money
Too small?
- You won’t meet your energy needs
- Batteries may undercharge, reducing their lifespan
- It’s hard to expand if you didn’t plan ahead
- You’ll end up disappointed in the system
Ignoring Permits Can Get Expensive
Yes, even DIY solar needs permits in most areas.
- Don’t assume you’re exempt many states require permits for any electrical work
- Inform your utility before connecting a system to the grid
- Skipping permits can void insurance, delay home sales, or lead to fines
- No inspection means no guarantee the system is safe
Taking your time to get these details right will make sure your solar setup is safe, legal, and built to last. Don’t learn the hard way plan ahead and do it right the first time.
FAQs About DIY Solar Panel Install Kits
Based on our extensive diy solar panel install kit review and reader feedback, these are the most common questions about DIY solar installation.
1. What warranty coverage do you get with DIY solar kits compared to professional installations?
DIY installations typically include equipment warranties but no workmanship coverage:
DIY Warranties:
1. Solar panels: 20-25 years power output, 10-12 years materials
2. Inverters: 5-25 years depending on type
3. Charge controllers: 2-5 years
4. Mounting hardware: 10-20 years
5. No installation labor warranty
Professional Installation Warranties:
1. Same equipment warranties as DIY
2. Installation workmanship: 1-10 years
3. System performance guarantees
4. Service and maintenance support
Some manufacturers offer extended warranties for professionally installed systems. Review warranty terms carefully before choosing between DIY and professional installation.
2. Are DIY solar panel kits compatible with existing electrical systems and smart home setups?
Compatibility depends on the specific kit and your existing setup:
Off-grid systems: Generally compatible with any electrical system since they operate independently Grid-tie systems: Must be compatible with your electrical panel and utility requirements Battery backup: Can integrate with existing circuits through transfer switches Smart home compatibility: Varies by manufacturer – some offer smartphone apps and home automation integration
The SunPower Equinox and Renogy systems offer the best smart home integration in our testing. Always verify compatibility before purchasing, especially for grid-tie applications.
3. What happens if something goes wrong during DIY solar panel installation?
Having a contingency plan is essential for DIY installations:
During Installation:
- Stop work immediately if you encounter unexpected problems
- Contact manufacturer technical support for guidance
- Consult local electricians for complex electrical issues
- Don’t proceed if you’re unsure about safety or code compliance
Common Issues and Solutions:
- Roof leaks: Call roofing professional immediately
- Electrical problems: Consult licensed electrician
- Equipment failure: Contact manufacturer warranty support
- Permit issues: Work with building department to resolve
Most reputable manufacturers offer excellent technical support. Document your installation with photos and keep detailed records for warranty claims.
4. How much money can you realistically save by installing solar panels yourself?
DIY installation typically saves $3,000-$8,000 compared to professional installation:
Professional Installation Cost: $15,000-$25,000 for 6kW system DIY Installation Cost: $8,000-$15,000 for equivalent system Potential Savings: $5,000-$12,000
However, consider these factors:
- Time investment (20-40 hours)
- Tool and equipment purchases
- Potential mistakes requiring professional help
- Warranty differences
- Financing options (often only available through installers)
Our analysis suggests DIY makes financial sense if you value your time at less than $150-$250 per hour and have adequate skills for the installation.
5. Do DIY solar panel kits work in all climates and weather conditions?
Quality DIY solar kits work in most climates, but performance varies:
Cold Climates:
- Panels actually perform better in cold temperatures
- Snow can block panels but also helps clean them when melting
- Battery performance decreases in extreme cold
- Ice loading must be considered for mounting systems
Hot Climates:
- Panel efficiency decreases as temperature rises
- Inverters may need additional cooling
- UV exposure can accelerate component aging
- Heat affects battery performance and lifespan
Wet Climates:
- Proper weatherproofing becomes critical
- Reduced solar irradiance affects power output
- Corrosion protection needed for mounting hardware
All kits in our testing performed adequately across different climates with proper installation and maintenance.
6. What ongoing maintenance is required for DIY solar panel systems?
Solar systems require minimal but important maintenance:
Monthly (5-10 minutes):
- Visual inspection for damage or debris
- Monitor system performance through app or display
- Check battery voltage (if applicable)
Quarterly (30-45 minutes):
- Clean panels if needed (dust, bird droppings, pollen)
- Inspect all visible wiring and connections
- Test ground fault circuit interrupters
Annually (2-3 hours):
- Comprehensive system inspection
- Torque check on mounting hardware
- Inverter filter cleaning/replacement
- Battery maintenance (if applicable)
- Professional inspection recommended
Long-term (5-10 years):
- Inverter replacement (varies by type)
- Battery replacement (lead-acid: 3-7 years, lithium: 10-15 years)
- Panel cleaning/restoration if needed
You can read: How to Install Solar Panels on the Roof (Step-by-Step Guide)?
Just remember, building your own solar system requires knowing your limits, planning well, and staying safe. So start with small solar project, learn smart maintenance techniques, and even seek professional help if necessary.
Our SolarPanel.news’s research shows that DIY solar is making clean energy accessible to more people. So choose the right kit, follow the instructions, and enjoy free electricity for years to come.