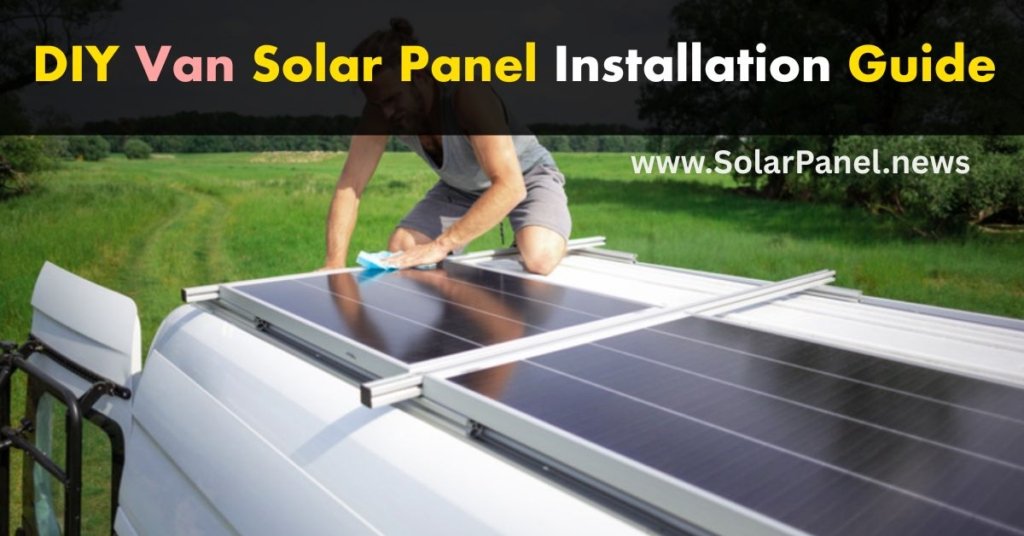
Installing solar yourself? If you’re a self-reliant vanlifer eager to ditch the grid, this step-by-step guide simplifies everything from layout and wiring to sealing and testing. You’ll gain the confidence to power your adventures with clean, renewable energy.
Pre-Installation Planning & Measurements
Before you even think about drilling holes, proper planning is crucial for a successful van solar installation. This initial stage sets the foundation for a reliable and efficient system.
Assessing Your Power Needs
Start by figuring out what you want to power. Are you running a mini-fridge, charging laptops, or simply keeping your phone topped off? List all your devices and their wattage (W) or amperage (A). This helps determine your total energy consumption (Watt-hours or Amp-hours per day) and, consequently, the size of the solar array and battery bank you’ll need. Don’t forget to factor in cloudy days or periods of low sunlight!
Mapping Out Your Roof Space
Every van roof is unique. Take precise measurements of your usable roof area, considering roof vents, skylights, fans, and any other obstructions. Think about how many panels you want to install and how they’ll fit. Sketch out different layouts on paper or use a simple CAD program. You’ll also need to consider where your wiring will enter the van – usually near the charge controller and battery bank.
Essential Tools and Materials
Having the right tools on hand makes all the difference. Here’s a basic list of what you’ll likely need:
(By clicking on the link, you can purchase the products directly from the Amazon store or learn more about the product:)
- Measuring tape ➡
- Drill and drill bits (for mounting brackets and cable entry) ➡
- Caulking gun ➡
- Wire strippers and crimpers ➡
- Multimeter (for testing connections) ➡
- Wrenches/sockets ➡
- Personal protective equipment (PPE) like gloves and safety glasses ➡
- Basic hand tools (screwdrivers, pliers) ➡
As for materials, you’ll need your solar panels, mounting brackets, solar cables (MC4 connectors), a charge controller, a battery bank, an inverter (if you need AC power), fuses, and sealant designed for outdoor use. Many vanlifers find it convenient to grab their cables, connectors, and some specialized tools directly from Amazon.

Roof Panel Mounting Methods
Once your planning is solid, it’s time to get those panels securely on your roof. There are a couple of popular methods, each with its own advantages.
Option 1: Z-Brackets for Secure Mounting
Z-brackets are perhaps the most common and robust way to mount solar panels. These small, aluminum brackets bolt directly to the panel frame and then to your van’s roof.
Process of mounting panels on the roof (DIY Tutorial):
- Position Panels: Carefully place your panels on the roof in your pre-determined layout. Mark the exact locations for the Z-brackets.
- Drill Pilot Holes: Using a drill bit slightly smaller than your screws, drill pilot holes through your van’s roof at each marked point. Be extremely careful not to drill into any internal wiring or components!
- Apply Sealant: Before attaching the brackets, apply a generous amount of marine-grade sealant (like Dicor Self-Leveling Lap Sealant or Sikaflex) around and into each pilot hole. This is critical for preventing water leaks.
- Secure Brackets: Screw the Z-brackets firmly into place, ensuring they’re tight and the sealant creates a watertight seal.
- Attach Panels: Bolt the solar panels to the Z-brackets using the appropriate hardware. Double-check that everything is secure.
“I drove through three Midwest storms last summer, and the brackets didn’t budge.” — Danielle M., Michigan vanlifer
Option 2: Adhesive Tape or Mounts (No-Drill Alternative)
If you’re not ready to drill holes, use 3M VHB tape or corner mounts with industrial adhesive.
- Works best on flat fiberglass or metal roofs
- Prep surface thoroughly with isopropyl alcohol
- Press down firmly and let it cure for 48–72 hours
Watch out: Tape-based methods may fail in extreme heat or over time if weight exceeds the rated limit.
Wiring to Charge Controller & Battery
This is where your solar system comes to life! Correct wiring ensures efficient power transfer and protects your components. If you’re new to electrical work, consider consulting an expert or watching detailed video tutorials.
Connecting Panels to the Charge Controller
Your solar panels will typically connect to each other in series or parallel (or a combination) using MC4 connectors. These are weatherproof and easy to use.
- Series Wiring: Connect the positive (+) of one panel to the negative (-) of the next. This increases voltage.
- Parallel Wiring: Connect all positives (+) together and all negatives (-) together. This increases current (amperage).
- To the Charge Controller: Your main positive and negative wires from the solar array will then run into your solar charge controller. The charge controller is vital; it regulates the voltage and current from your panels to safely charge your batteries, preventing overcharging. Make sure to connect the solar input terminals correctly.
From Charge Controller to Battery Bank
The charge controller then connects directly to your battery bank.
- Battery Connections: Connect the positive (+) terminal of the charge controller to the positive terminal of your battery bank. Do the same for the negative (–) terminals.
- Fuses: Always install appropriately sized fuses on the positive line between the charge controller and the battery bank, and between the battery bank and any inverter. Fuses protect your system from short circuits and overcurrents, preventing damage and potential fires.
- Inverter Connection (if applicable): If you’re running AC appliances, your inverter will connect directly to your battery bank (again, with a fuse). The inverter converts the DC power from your batteries into usable AC power.
For cables, many DIYers find pre-cut solar cable kits with MC4 connectors on Amazon to be a convenient and reliable option. Look for cables with good insulation and proper gauge for your system’s amperage.
Sealing and Weatherproofing
This step cannot be overstated. A perfectly installed solar system is useless if water gets into your van. Proper sealing protects your investment and your vehicle’s interior.
Sealing Cable Entry Points
If you drilled a hole through your roof for the solar cables, this is a critical point to seal:
Cable Gland/Roof Gland: Use a dedicated cable gland (also called a roof gland or cable entry housing). These are designed to provide a watertight seal around the cables where they pass through the roof.
Sealant Application: Apply a generous bead of high-quality marine-grade or RV-specific sealant around the base of the cable gland where it meets the roof. Also, ensure the gland itself is tightened down properly to compress its internal rubber gasket around the cables.
Inspect Regularly: Over time, sealants can degrade. Make it a habit to regularly inspect all sealed areas, especially after harsh weather, and reapply sealant as needed.
Protecting Electrical Connections
While MC4 connectors are designed to be weatherproof, further protection is always a good idea, especially for any exposed wiring or connections on the roof.
- Conduit: Consider running your cables through UV-resistant electrical conduit on the roof. This protects them from abrasion, sun exposure, and physical damage.
- Junction Boxes: For more complex arrays, waterproof junction boxes can house multiple connections, keeping them dry and organized.
- Strain Relief: Ensure cables aren’t under tension, which could pull them out of connectors or break seals. Use cable ties or clips to secure them neatly.
How I Installed SOLAR POWER in my VAN (Off Grid VAN) – FULL Tutorial
I followed this video tutorial by my friend Tori Delury – How I installed Regit solar panels on my van and what I considered. So you too can set up this off-grid technology in your van by following this step-by-step tutorial:
System Testing & Troubleshooting
Once everything is connected and sealed, it’s time to fire up your system and ensure it’s working as expected.
Initial Power-Up and Monitoring
Connect Battery First: Always connect your battery to the charge controller before connecting the solar panels. This ensures the controller recognizes the battery voltage first.
Connect Panels Last: Once the battery is connected, connect your solar panels to the charge controller.
Check Readings: Your charge controller should have a display or indicators showing voltage, current, and charging status. Verify that it’s detecting the solar input and that your batteries are receiving a charge. On a sunny day, you should see current flowing from the panels to the battery.
Test Appliances: Connect an appliance to your inverter (if you have one) to confirm you’re getting AC power. Check that your 12V appliances (if direct-wired) are also working.
Common Issues and Simple Fixes
- No Power/Charging:
- Check all connections: A loose wire is a common culprit.
- Verify Fuses: A blown fuse will stop the current flow.
- Charge Controller Settings: Ensure your charge controller is set to the correct battery type (e.g., lithium, AGM).
- Sunlight: Are the panels in direct sunlight? Are they clean?
- Low Power Output:
- Shading: Even partial shading on one panel can significantly reduce the output of the entire array.
- Dirty Panels: Dust, dirt, and bird droppings can reduce efficiency. Clean them regularly.
- Wiring Issues: Incorrect series/parallel wiring can lead to unexpected voltage or current.
- Battery Not Charging Fully:
- Undersized Array: Your panels might not be generating enough power for your consumption.
- Battery Health: Older batteries may not hold a charge well.
- Parasitic Loads: Are there devices constantly drawing power even when off?
Related Post- Portable vs Roof‑Mounted Van Solar Panels: Which Is Best?
Safety First
Always prioritize safety. When working with electricity, especially high-current DC systems, always disconnect power before making any adjustments or repairs. Use insulated tools, and consider having a fire extinguisher handy in your van.
Conclusion,
Congratulations! You’ve empowered your van with a fully functional solar system! This DIY project not only saves you money but also provides immense satisfaction and freedom. Now, head to Amazon and grab all the cables, connectors, and tools you just learned about to kickstart your off-grid adventures!


